


HOLE #1 – ZENITH
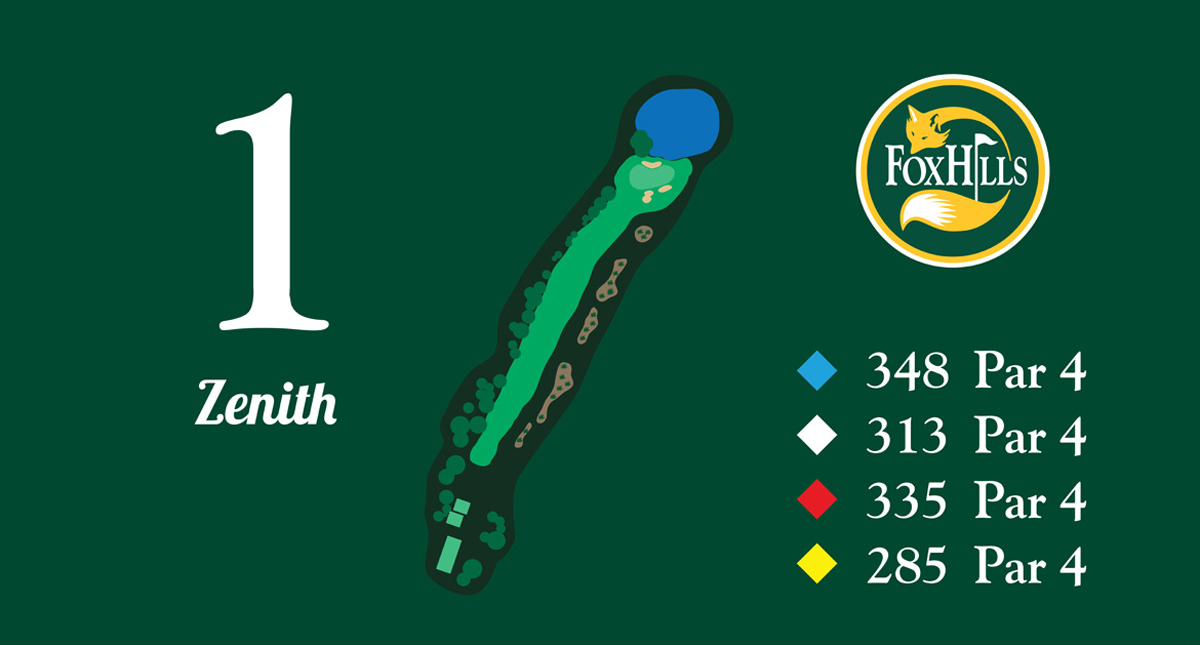
Proudly Sponsored by Compass Electrical
The downhill opening Tee-Shot is confronted by a sliver of a fairway. The water that lurks inconspicuously beyond the green has been known to claim many unsuspecting victims. Par is your friend.
| TEE | METRES | INDEX | PAR |
| GA RED | 335 | 10 | 4 |
| GA BLUE | 348 | 11 | 4 |
Hole #2 – Grandiose
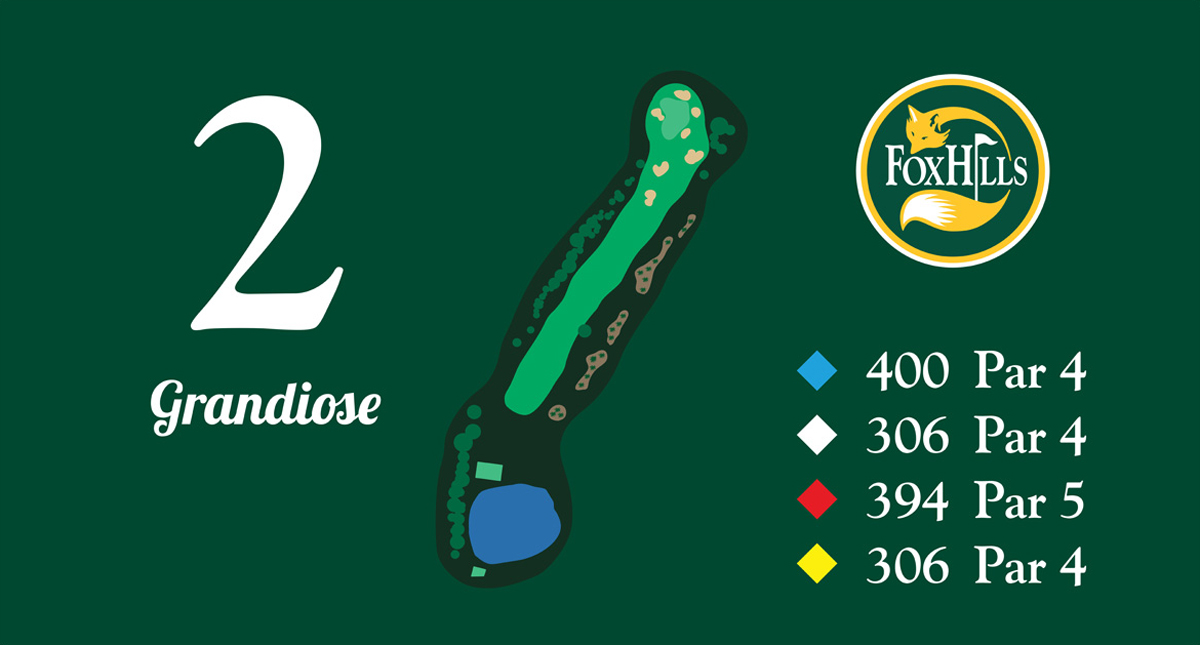
Proudly Sponsored by Scotty Cameron
The Tee-Shot needs to avoid the native areas on the right, to afford an opportunity to find a heavily bunkered green. The green complex is multi-tiered with distance control on the approach essential to avoid 3-putting.
| TEE | METRES | INDEX | PAR |
| GA RED | 394 | 11 | 5 |
| GA BLUE | 400 | 2 | 4 |
Hole #3 – Flotsam
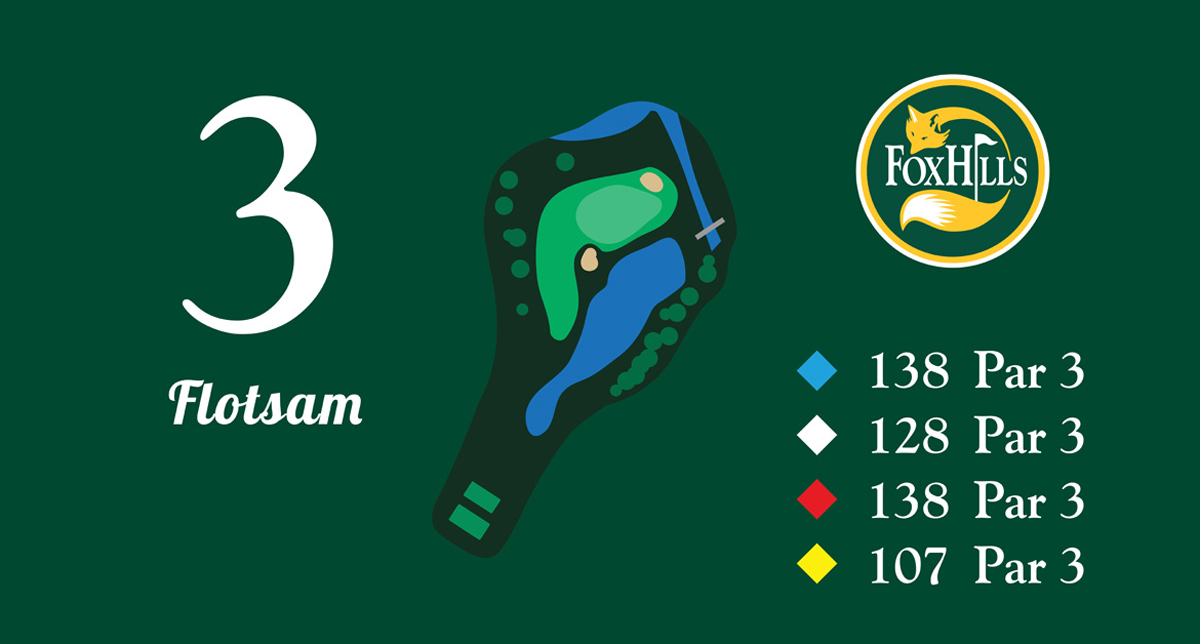
A seemingly benign, picturesque water-carry hole, known to morph into the site of many aquatic demises. Pulling the correct club will have its reward. Challenge a diabolical back right pin location at your peril.
| TEE | METRES | INDEX | PAR |
| GA RED | 138 | 12 | 3 |
| GA BLUE | 138 | 12 | 3 |
Proudly Sponsored by Genneral Staircase
![]()
Hole #4 – Gauntlet
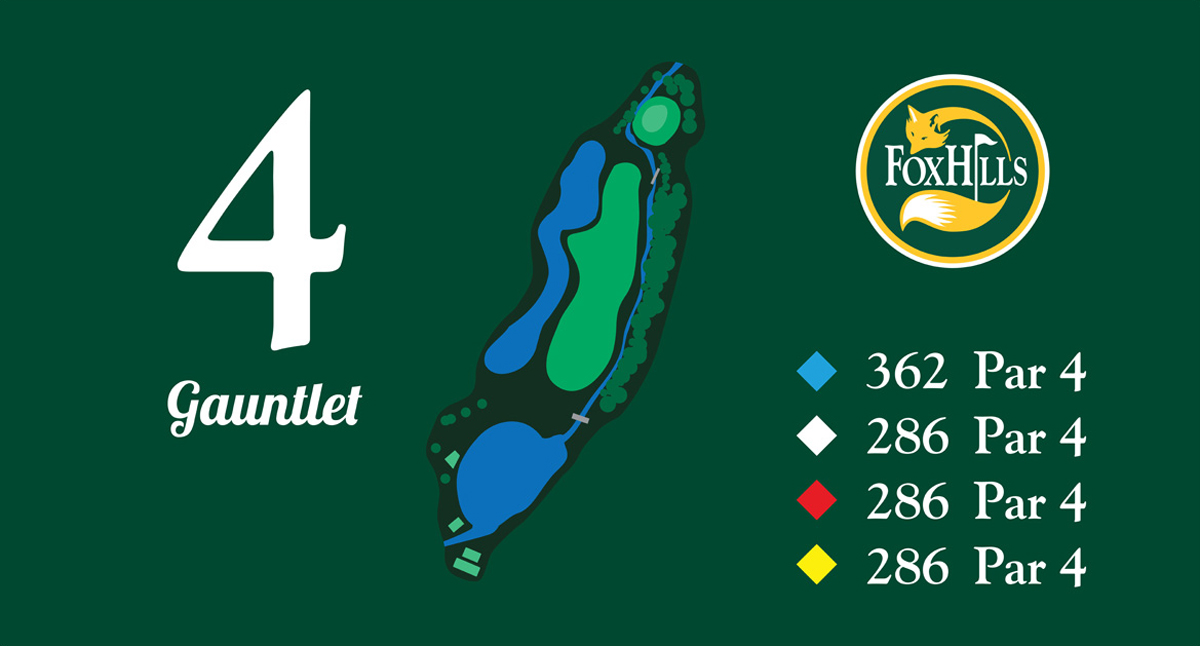
Proudly Sponsored by Pendle Inn
Precision is necessary off the Tee to find a peninsula-like fairway. A water-carry approach shot to an infinitesimal green protected by overhanging tree limbs caps off the sternest challenge golf has to offer. Navigating this hole to completion with the same ball is a noteworthy achievement.
| TEE | METRES | INDEX | PAR |
| GA RED | 286 | 1 | 4 |
| GA BLUE | 362 | 1 | 4 |
Hole #5 – Quintessence
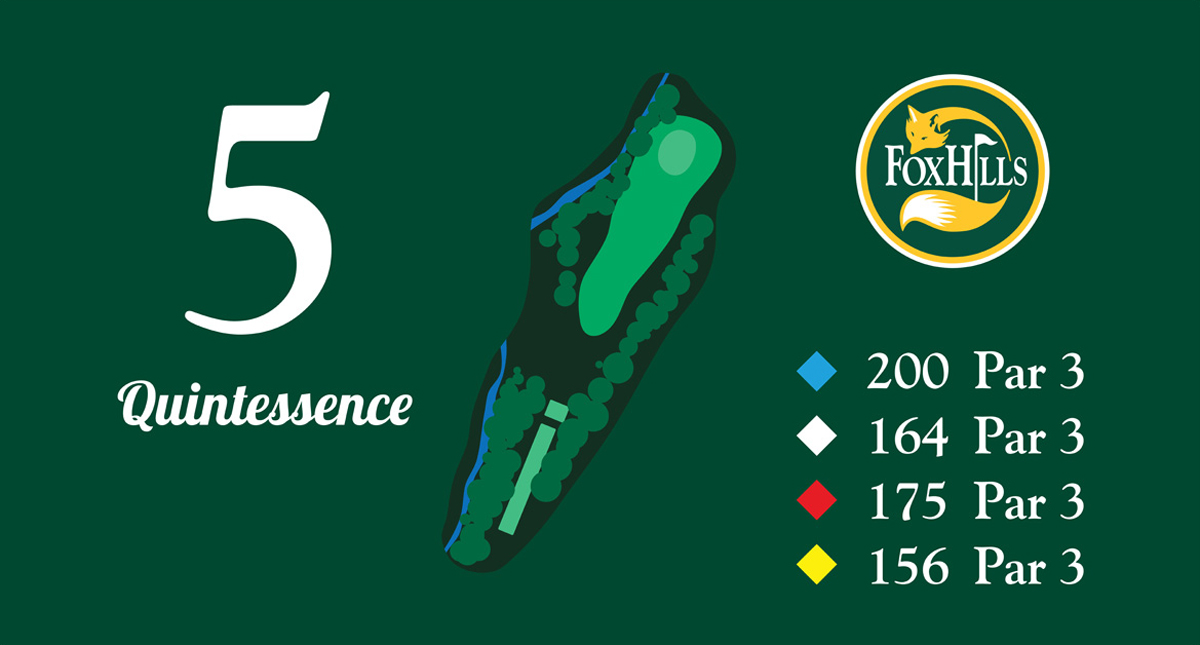
Proudly Sponsored by Harrison Electrical Services
A long ‘One-Shot Hole’ with elements to evoke claustrophobic tendencies. From out of a chute, with water encroaching on the entire left and O.O.B up the entire right side, there’s no half measures on this beast of a hole.
| TEE | METRES | INDEX | PAR |
| GA RED | 175 | 7 | 3 |
| GA BLUE | 200 | 4 | 3 |
Hole #6 – Insidious
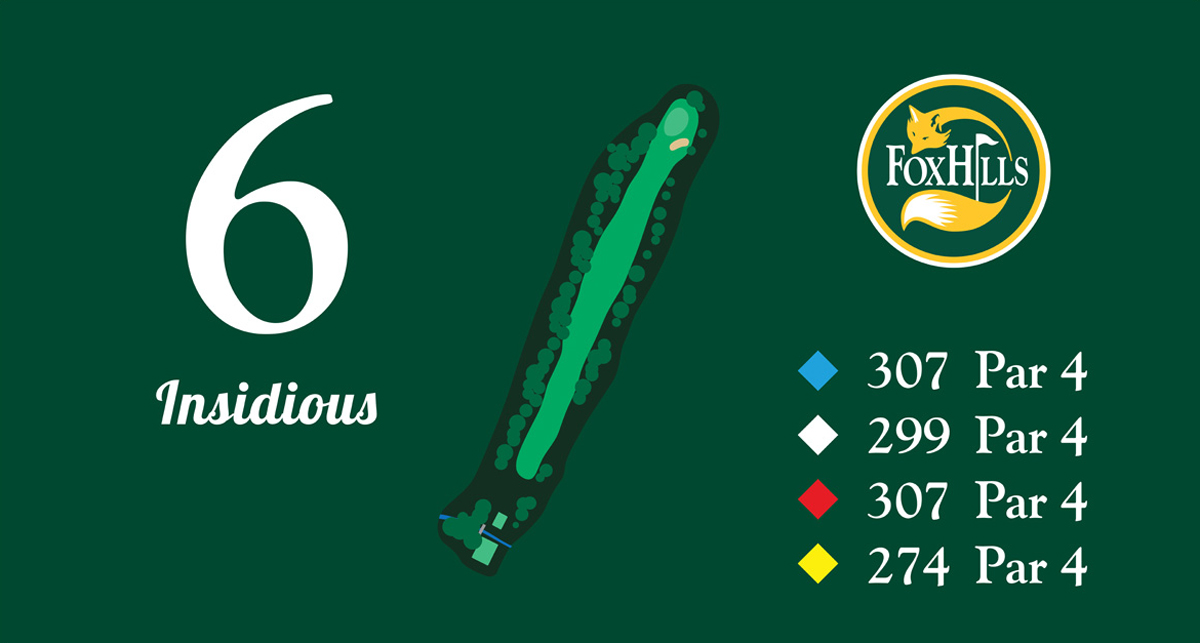
A good Tee-Shot on this narrow, tree-lined fairway will present a birdie opportunity. An errant Tee-Shot will often deny a genuine look at the green with your approach. The right bunker offers the solitary protection for this smallish green.
| TEE | METRES | INDEX | PAR |
| GA RED | 307 | 15 | 4 |
| GA BLUE | 307 | 16 | 4 |
Proudly Sponsored by Fine Line Fire
![]()
Holf #7 – Arcane
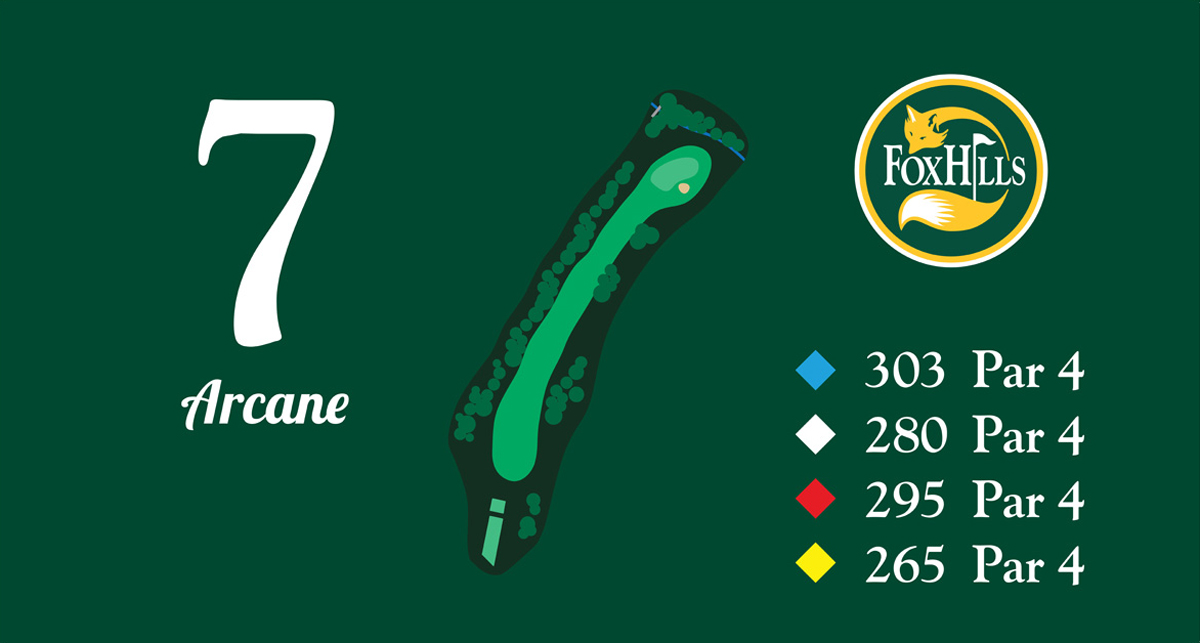
Proudly Sponsored by Opie Manufacturing Group
A short, downhill, dogleg right Par 4 with the green majestically concealed by a copse of trees from the Tee awaits. A powerful, accurate drive to reach the elbow of the dogleg will present unimpeded access to a deceptive green, with multiple fall-off areas. The fescue on the periphery of the right bunker has ruined many a Score Card.
| TEE | METRES | INDEX | PAR |
| GA RED | 295 | 16 | 4 |
| GA BLUE | 303 | 17 | 4 |
Hole #8 – Maladroit
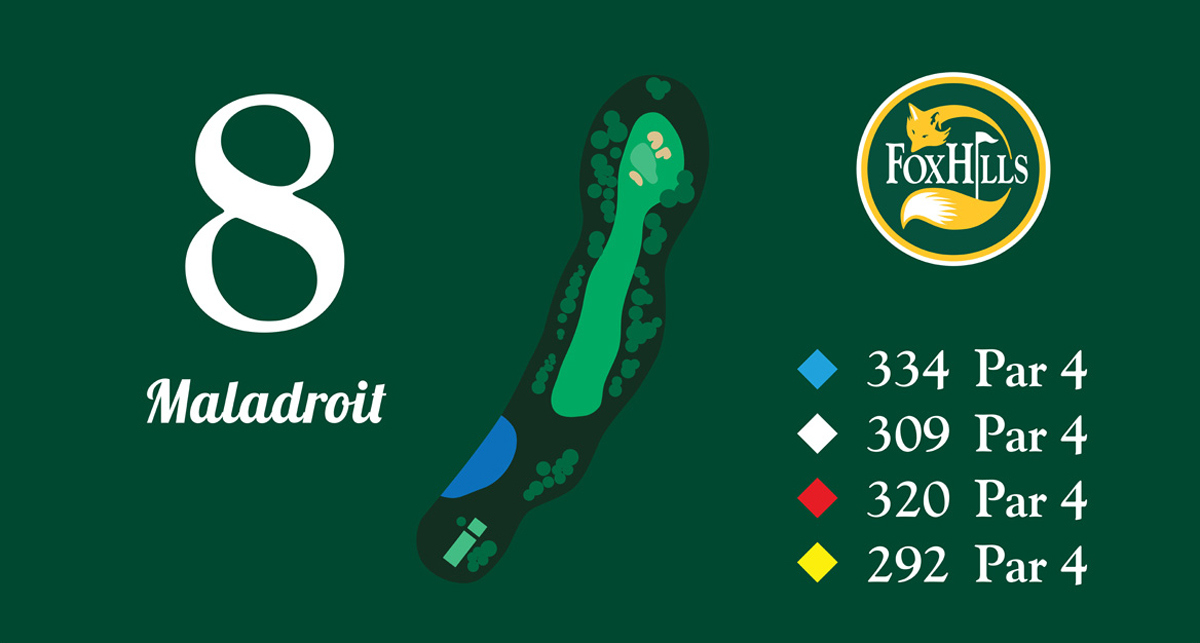
A slight dogleg left, uphill cambre necessitates a right to left Tee-Shot to avoid the O.O.B which immediately flanks the right fairway. The deep, front bunker that protects a green that slopes from front to back is a common destination for both good and bad shots alike.
| TEE | METRES | INDEX | PAR |
| GA RED | 320 | 2 | 4 |
| GA BLUE | 334 | 10 | 4 |
Proudly Sponsored by Stothard Skylights
![]()
Hole #9 – Ascent
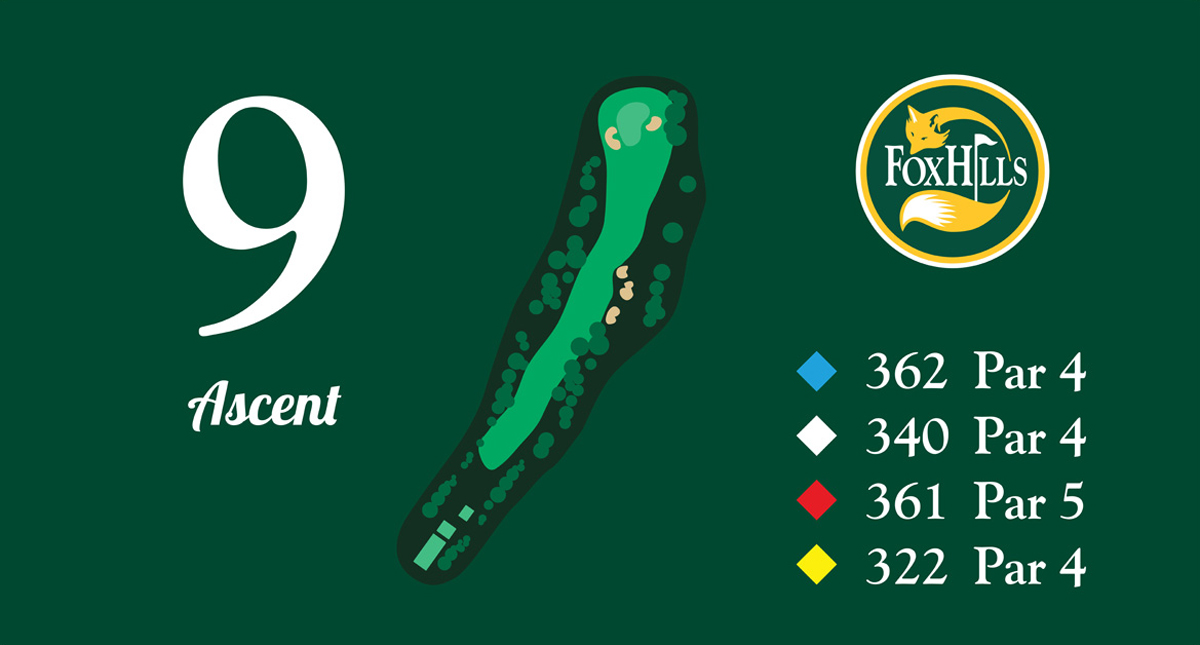
Proudly Sponsored by thinkinternet.com
From the Tee, a straight drive will avoid a collection of fairway bunkers on the right eager to deny an approach to a heavily guarded, multi-tiered green complex. The green itself presents its own set of challenges, with no bail-out areas ensuring recovery from being out of position is seldom achieved.
| TEE | METRES | INDEX | PAR |
| GA RED | 361 | 5 | 5 |
| GA BLUE | 362 | 5 | 4 |
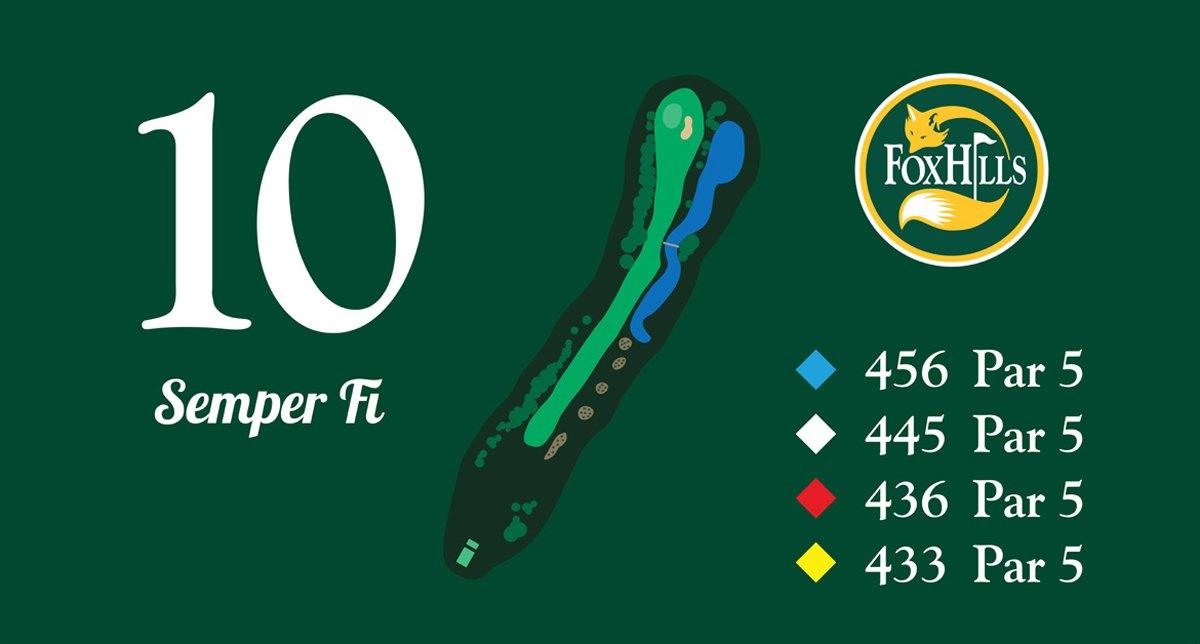
Hole #10 – Semper Fi
Proudly Sponsored by Xzibit Pools
For those contemplating reaching this Par 5 in two strikes, the water on the right from the Tee must be navigated successfully as a priority. For those strategizing as a 3-Shot Hole, the water which lurks ominously down the entire right side comes into play on multiple shots. A long, narrow flat green offers ample scoring opportunities to precise shot-making.
| TEE | METRES | INDEX | PAR |
| GA RED | 436 | 8 | 5 |
| GA BLUE | 456 | 15 | 5 |
Hole #11 – Nemesis
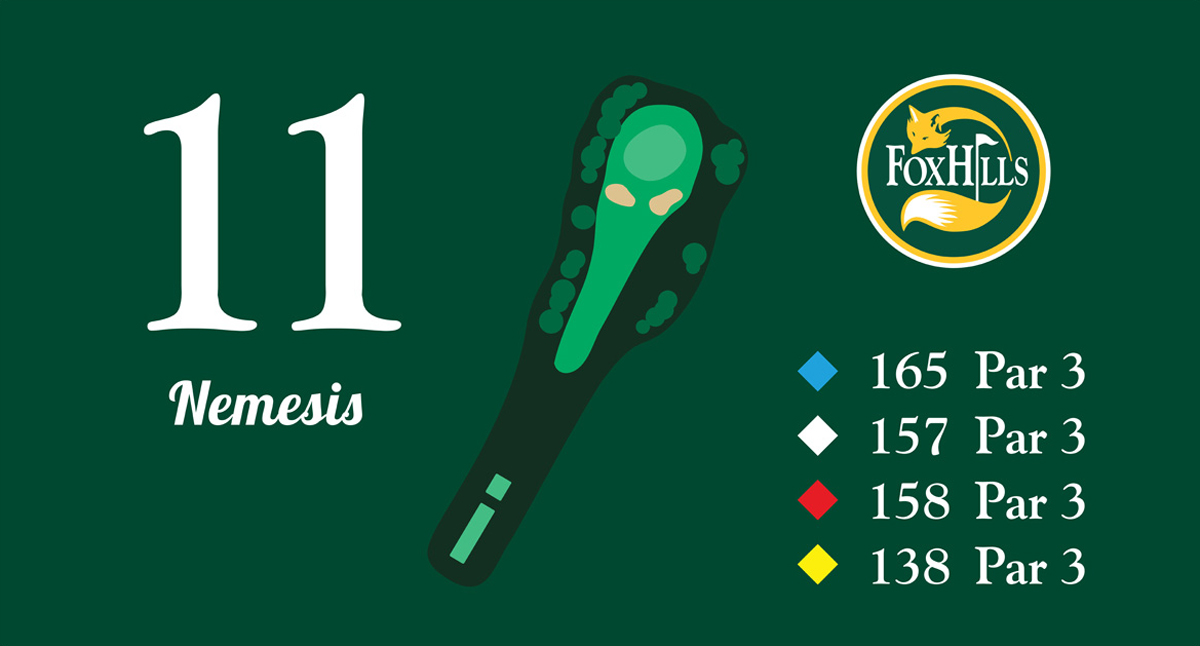
Front bunkering offers the obvious protection to this innocuous looking mid-range Par 3, however, the subtlety of the surrounds minimises par save percentages for Tee-Shots missing the putting surface.
| TEE | METRES | INDEX | PAR |
| GA RED | 158 | 14 | 3 |
| GA BLUE | 165 | 9 | 3 |
Proudly Sponsored by Mardon Meats
![]()
Hole #12 – Cleft
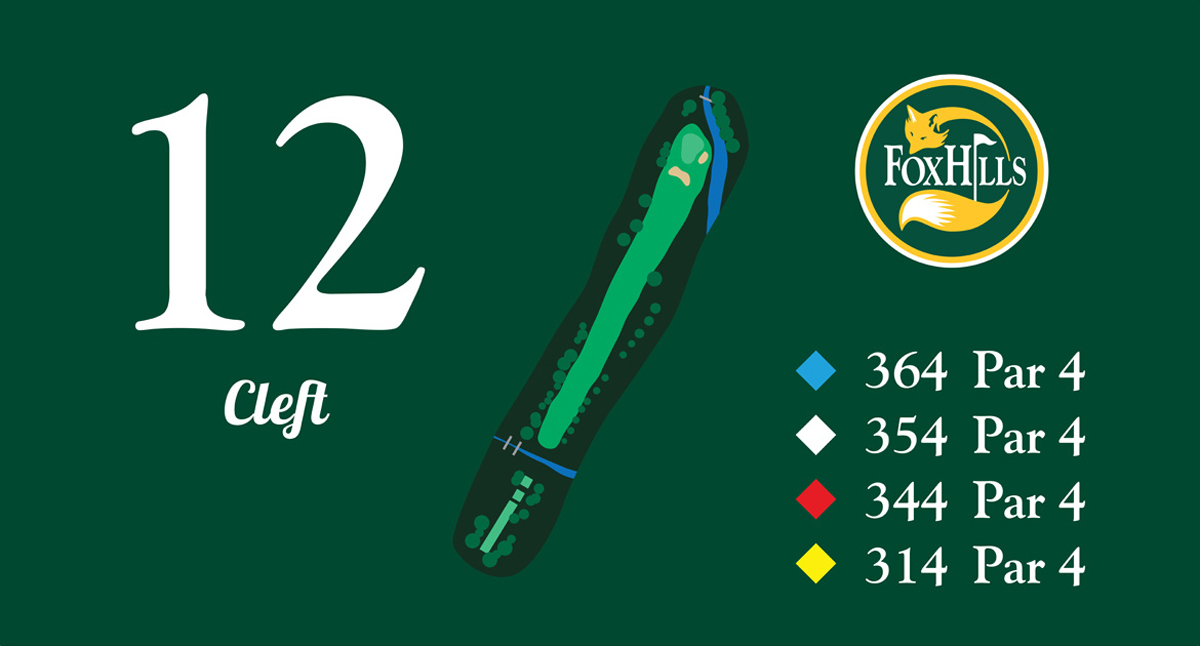
A long, narrow opening across water to find the fairway demands an accurate Tee-Shot. The approach shot brings its own set of challenges, with water right and beyond the green and a bunker in front guaranteed to collect all balls not struck with lofted ambition.
| TEE | METRES | INDEX | PAR |
| GA RED | 344 | 3 | 4 |
| GA BLUE | 364 | 6 | 4 |
Proudly Sponsored by Srixon Sports
![]()
Hole #13 – Betwixt
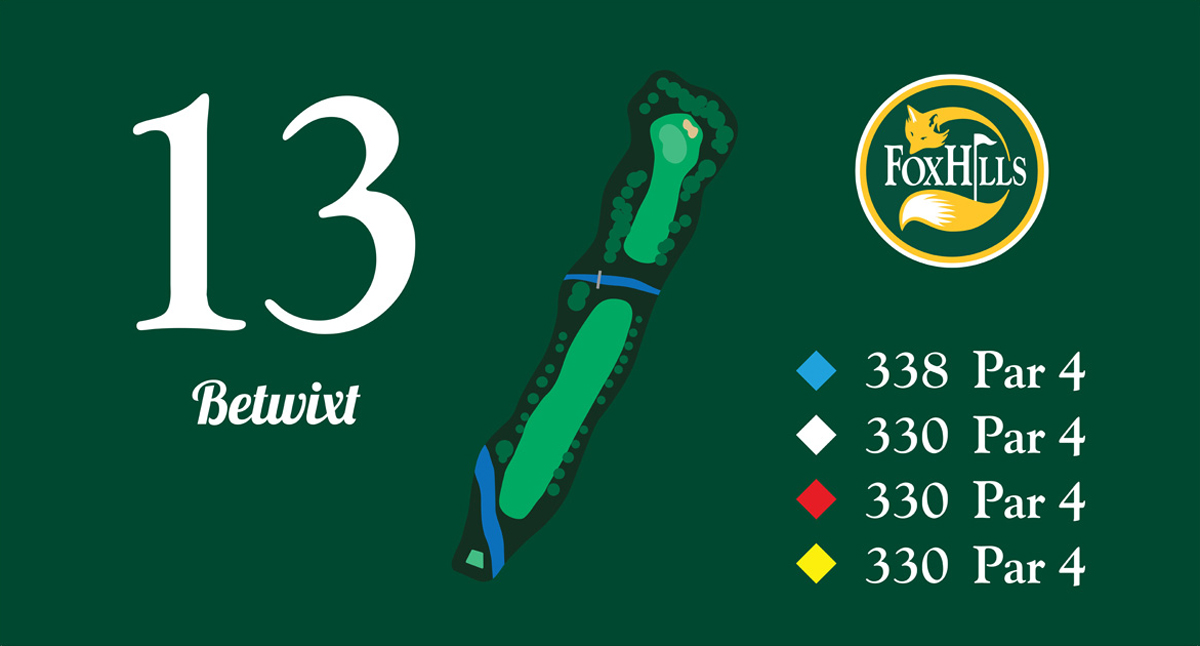
Proudly Sponsored by Srixon Sports
For all but the longest of-hitters, the Tee-Shot offers generous fairway scope. For the heavy hitters, a long straight drive across water shortens up the approach. The diagonal positioned green coaxes all approaches short left into a collection area which makes a par save a remote possibility.
| TEE | METRES | INDEX | PAR |
| GA RED | 330 | 4 | 4 |
| GA BLUE | 338 | 8 | 4 |
Hole #14 – Prudence
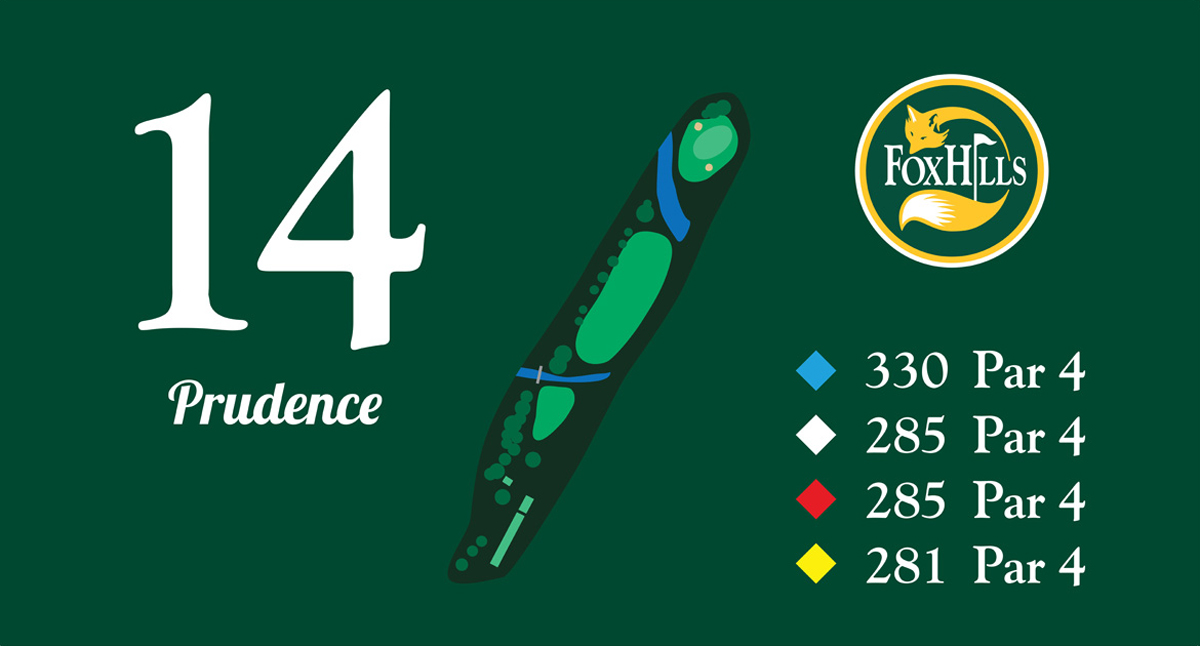
Proudly Sponsored by Kumho Tyres
A water-carry Tee-Shot to an island fairway sets up a short iron to the green also traversing water. The green, heavily sloped from back to front makes putting an event in itself.
| TEE | METRES | INDEX | PAR |
| GA RED | 300 | 13 | 4 |
| GA BLUE | 330 | 14 | 4 |
HOle #15 – Wee
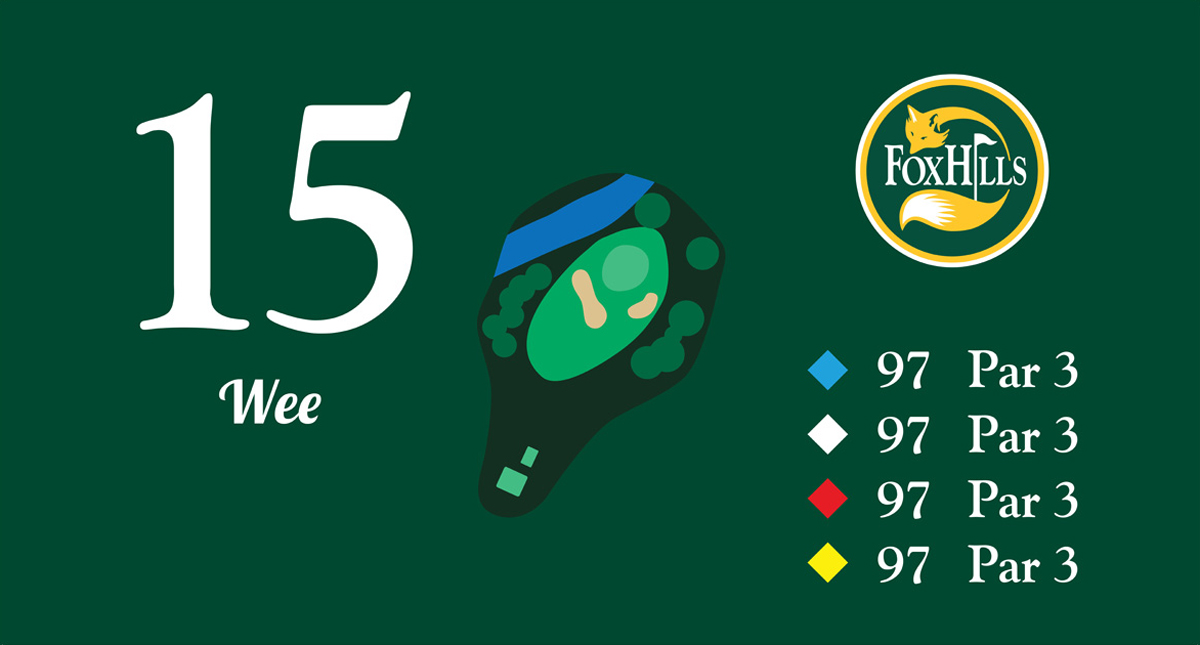
The difficulty of this Par 3 is dictated by the daily hole location. A forward Pin-Spot welcomes use of the back to front sloping green and birdie awaits. A Pin-Spot deep up the green is the ultimate lure of deception. Overshooting the green is instant surrender.
| TEE | METRES | INDEX | PAR |
| GA RED | 97 | 18 | 3 |
| GA BLUE | 97 | 18 | 3 |
Proudly Sponsored by Western Truck
![]()
Hole #16 – Labyrinth

Not even the purest of drives is guaranteed to find this snaking, tree-lined fairway. Once negotiated, an intermediate creek insists the approach is aerial to a slightly elevated green. Upon reaching the putting surface, another challenge awaits on this puzzling green.
| TEE | METRES | INDEX | PAR |
| GA RED | 355 | 9 | 5 |
| GA BLUE | 372 | 3 | 4 |
Proudly Sponsored by CLR Constructions
![]()
Hole #17 – Spartan
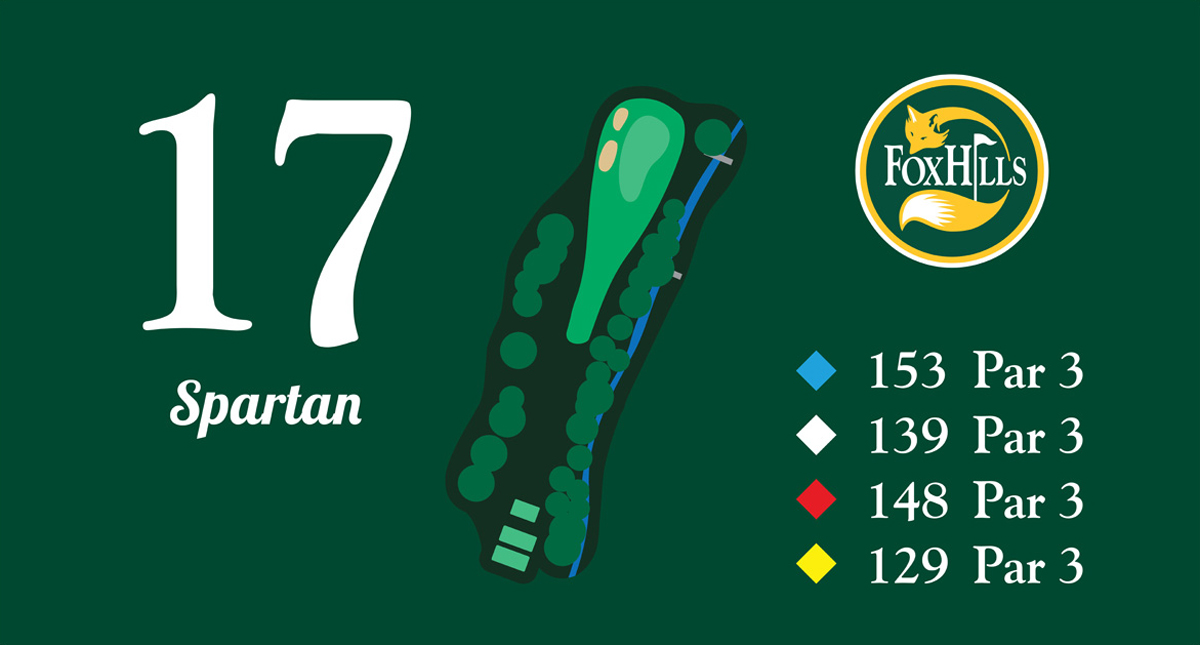
Proudly Sponsored by Eden Brae Homes
An intimidating creek which flanks the right side of the green creates a tendency to miss the Tee-Shot on the left in the dual bunkers, which is a no bargain for par. The green features a very narrow frontage which broadens all the way to the rear. A sleeper hole which offers few birdies.
| TEE | METRES | INDEX | PAR |
| GA RED | 148 | 17 | 3 |
| GA BLUE | 153 | 13 | 3 |
Hole #18 – Gambit
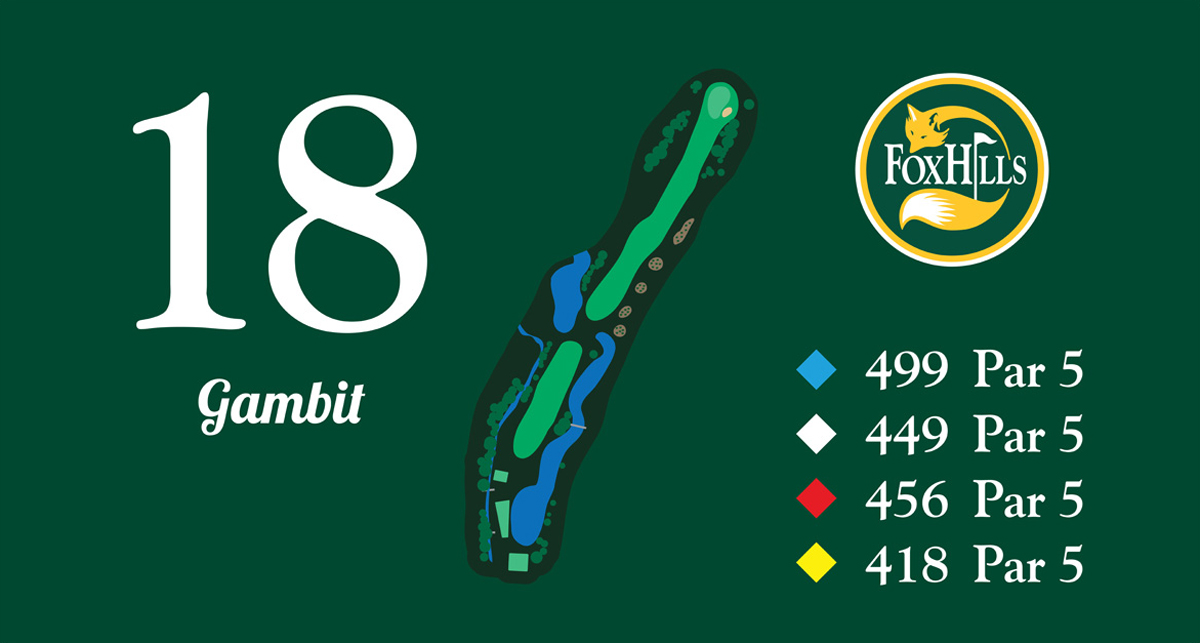
For all but the longest of hitters, water avoidance from the Tee is of primary concern. The 2nd shot demands accuracy to offer a straightforward approach to a receptive green. A severe slope on the front portion of the green can make putting troublesome.
| TEE | METRES | INDEX | PAR |
| GA RED | 456 | 6 | 5 |
| GA BLUE | 499 | 7 | 5 |
Proudly Sponsored by Seven Hills RSL
